There I was, opening the freezer door to get some food. I was hungry, therefore I was impatient, and therefore I wasn't really thinking too much about what I was doing. While opening the freezer door, my fingers slipped off the door handle - except my third finger, which caught onto the door handle. I felt a snag on my finger and a bit of pain, and it took me a few seconds to realize that I had just torn my nail.
I was so upset I had to Twitter about it, and my non-nail fanatic friends were laughing at me because they thought it was so funny that I could get so worked up over a nail. But you know how it is with these things. You spend months growing them out, shaping them, caring for them with hand lotion and cuticle cream, and then, just when you think "My nails don't look like rubbish after all", they tear. It's heartbreaking, really, because if you trim them all the way down after a tear, you start from scratch, all over again.
Have a look at the damage. The freezer needs to DIE. I'd have smashed it to bits, but it had three tubs of ice cream inside, and I didn't want to ruin the ice cream.
I didn't want to trim my nails all the way down and start from scratch again, so I decided to try a DIY wrap with a tea bag to hold the nail in place until it grew out. I don't do this very often, so my skills at making teabag wrap are really Noob-ish, so you'll have to put up with the lousy skills here.
You'll Need:
1. Nail Polish Remover or Acetone (swipe over nail before applying the wrap)
2. Cotton Pad (for swiping acetone over nail before application)
3. Nail Glue (not base coat or nail treatment)
4. Tea bags (cut to just slightly smaller than nail size)
5. Scissors (for cutting tea bag wrap to size)
6. Tweezers (for placing the tea bag wrap over your nail surface)
7 Orange Sticks (for holding down the wrap while they dry)
8. File or Buffer (for smoothing out the wrap after application)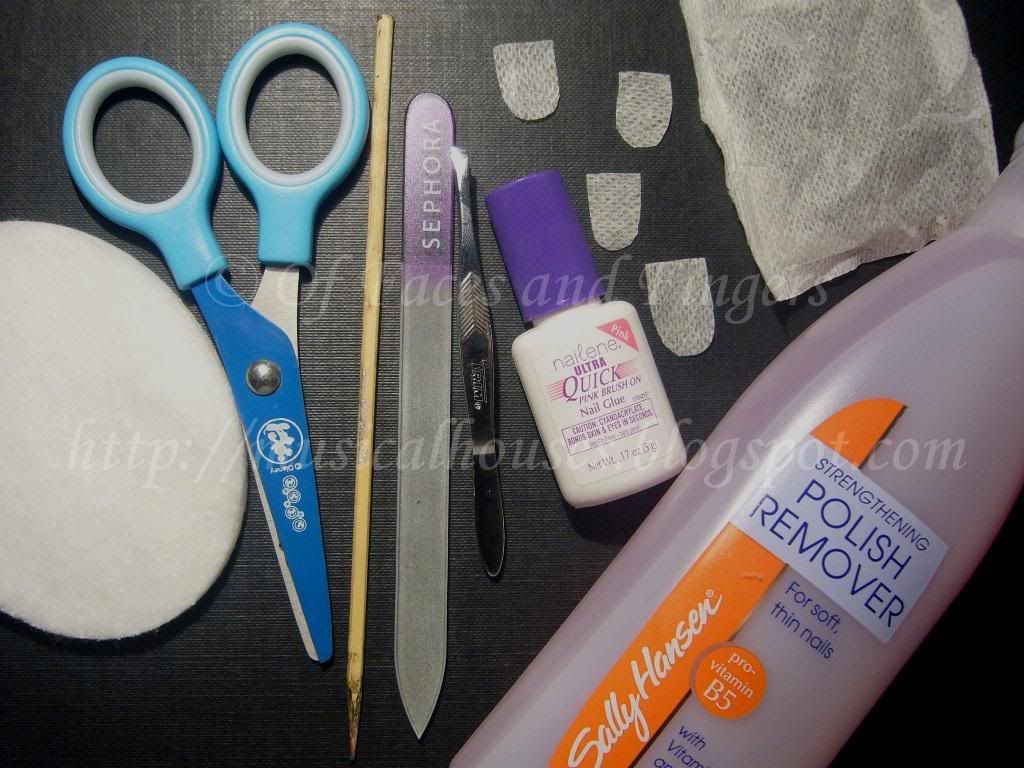
I'd like to point out that it HAS to be nail glue that you're using, as I had a question from a reader asking if she could use base coat or nail treatment instead. These weren't made to funtion as adhesives, so if you use them, the tea bag wrap won't stick to your nail. Any kind of nail glue will do, as long as it's a nail adhesive. I used the Nailene Ultra Quick Brush On Nail Glue, which dries fast, and also dries clear, which is useful if you don't want to sit around waiting for the nail glue to dry.
I also used a tea bag. Yup, your normal average tea bag. Cut it out to the size and shape of your nail. I just used a pen and a scissors for that. The cutouts here shown are the actual shape of my nail, but before you apply them you might want to make them a bit smaller than your actual nail size, so that you don't accidentally glue down the wrap onto the skin around your nail (which was what I did).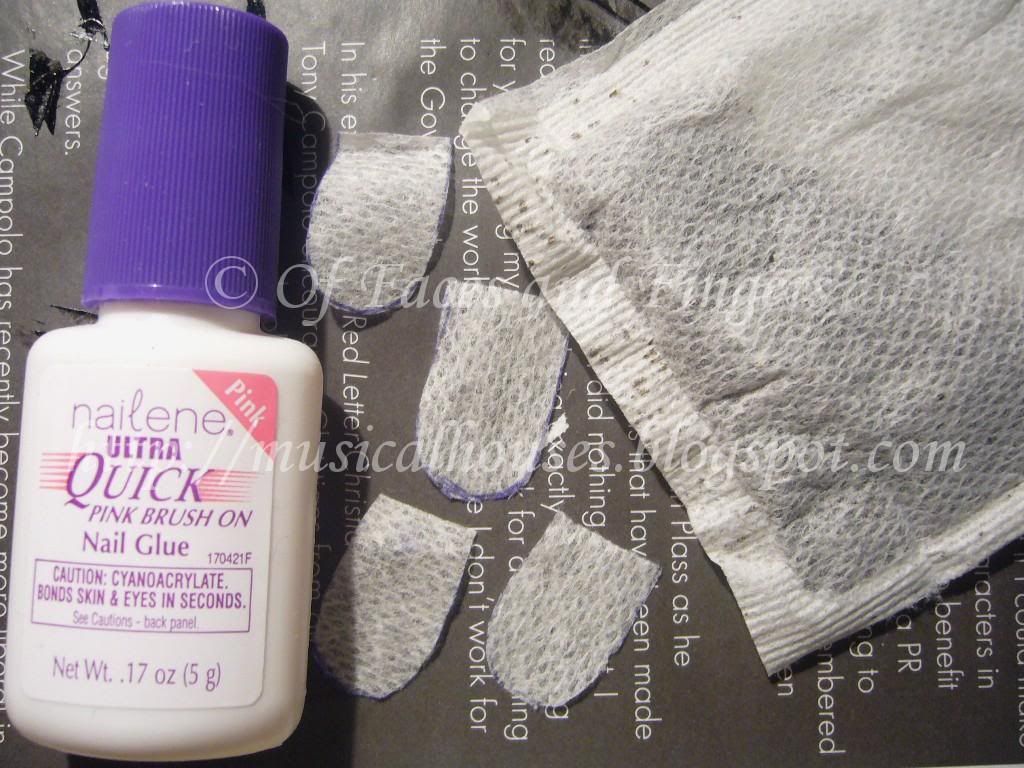
Step 1:
First, swipe your entire nail plate with acetone or nail polish remover. This helps get rid of the oils on your nails and helps the wrap adhere to your nail more securely.
Step 2:
Seal the tear with a bit of nail glue. You don't have to do this if the tear is small, but for a huge tear where the torn bit doesn't stay in place and might move around, it's a good idea. I think I put a bit too much here. You only really need a little bit to seal the tear. Too much and it will cause a bulge on your nail, which will make it harder to apply the wrap on top. You want to keep the surface flat so the wrap goes on more easily: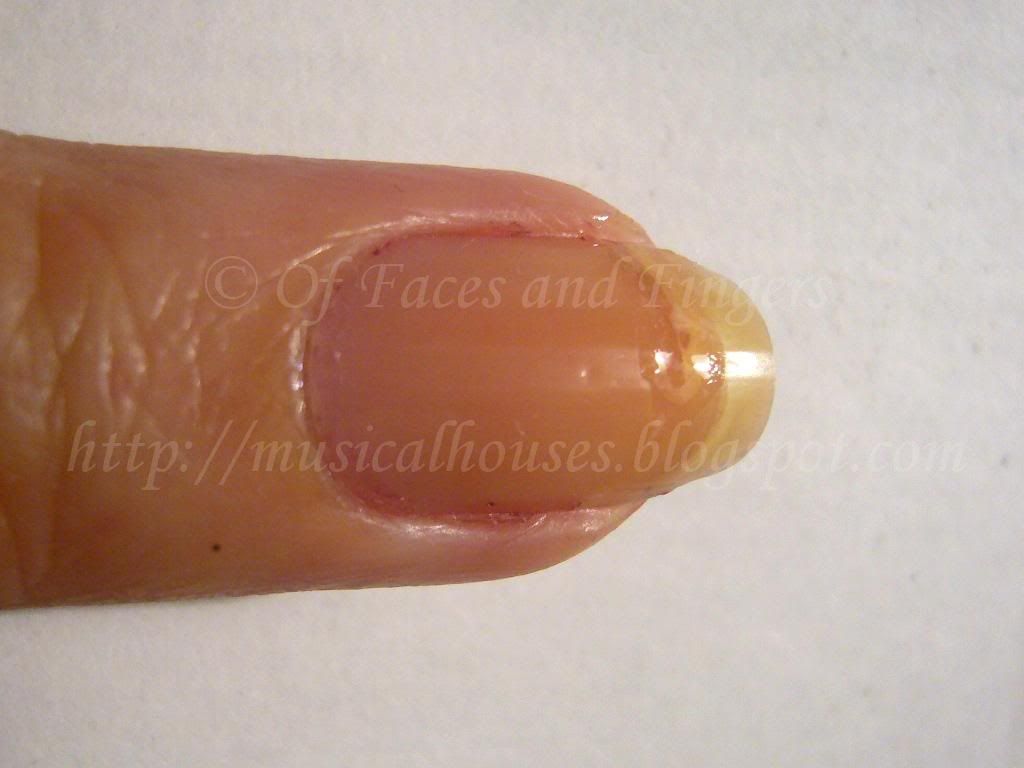
I don't have pictures for the next couple of steps, because you have to work quickly, so there wasn't time to stop and take photos.
Step 3:
Apply nail glue over the entire nail. Leave a little gap at the sides and at the base of the nail, near the skin and cuticles and the sides and bottom of the nail. This is important because you don't want to glue your cuticles or skin to your nail wrap!
Step 4:
Then, working quickly, use a pair of tweezers and place the nail-shaped tea bag cutout over your nail. Use tweezers, and not your fingers, or you will glue your fingers to your nail. And that's painful. (Um, not like I would know....*looks away and whistles*)
Step 5:
After the wrap is on the nail, use an orange stick to press down and hold the wrap in place while the glue dries. Remember, use an orange stick and not your fingers, or you'll get your fingers glued to your nail. This step will take a few minutes or longer, depending on how fast your nail glue dries. The important thing in this step is to make sure that there are NO air bubbles under your wrap, between the tea bag material and your nail. If there are any air bubbles, moisture could collect in them, and lead to bacterial growth, on the nail. So if you do see air bubbles, it's better to redo your wrap at this point. Better safe than sorry!
This is what my nail looks like at this point: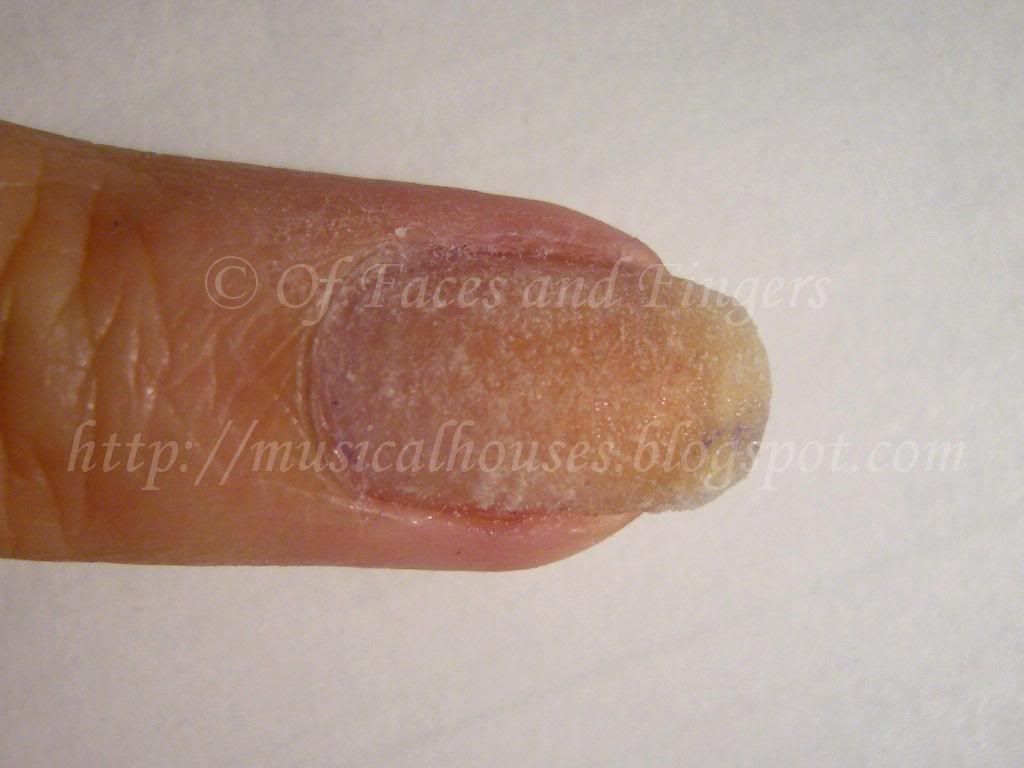
As you can see, I am a DIY nail wrap noob, and I glued my cuticles and skin to my nail wrap, because I accidently put too much nail glue and cut the size of the nail wrap a little too big. I ended up using a bit of nail polish remover to un-stick my skin.
Step 6:
Next, put another layer of nail glue on top, and let it dry. The nail glue will saturate the wrap and make it turn clear (or at least, clear-ish). This way, the wrap will be secure, and it won't look as obvious.
Step 7:
You're all done. All that's left is to lightly file or buff down the surface of your wrap to smoothen it out. Don't overdo it, or you'll end up buffing through the wrap. Once you're done filing or buffing, and you can proceed to paint your nails with whatever colour you want.
Here's a photo of the finished wrap (pardon the lint and the remnants of previous polish, this was a photo of the wrap taken later in between manicure changes):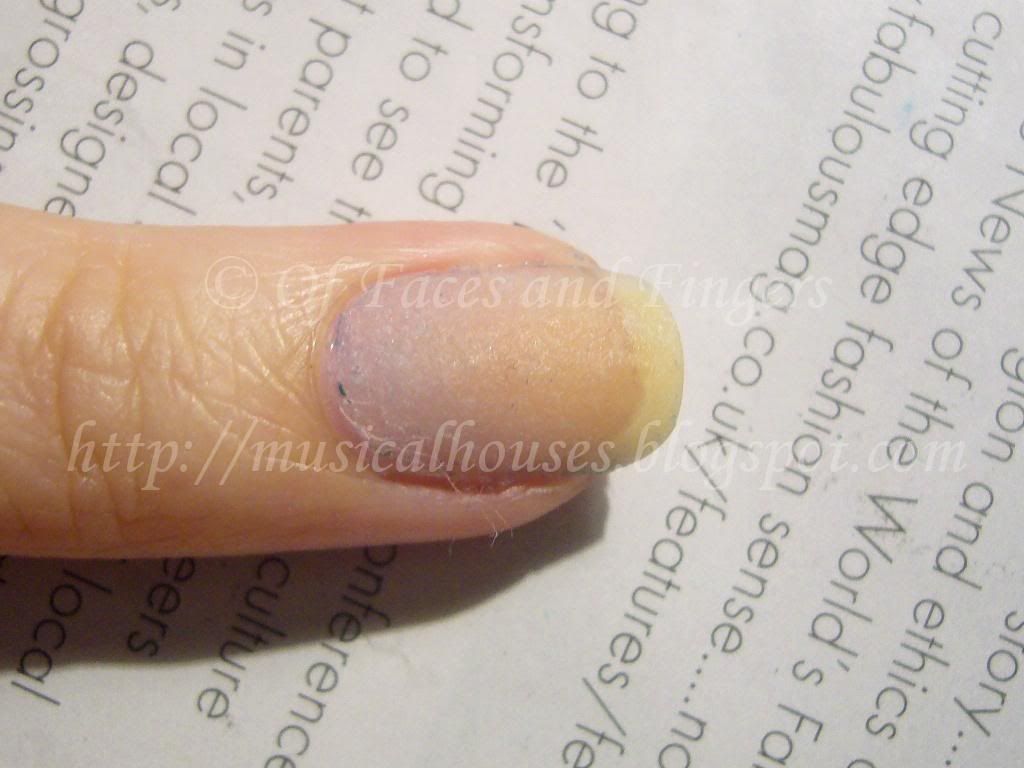
This wrap, noob-ish as it was, lasted me for around 2 weeks. Eventually I redid it because my nails were growing out, and for some strange reason a corner of the wrap chipped off. (Seriously, how does that happen?!)
Here's my fixed-up and pretty-fied nail. You can tell its the middle finger that broke, because the too-big wrap is sticking out from the sides of my nail. Oops.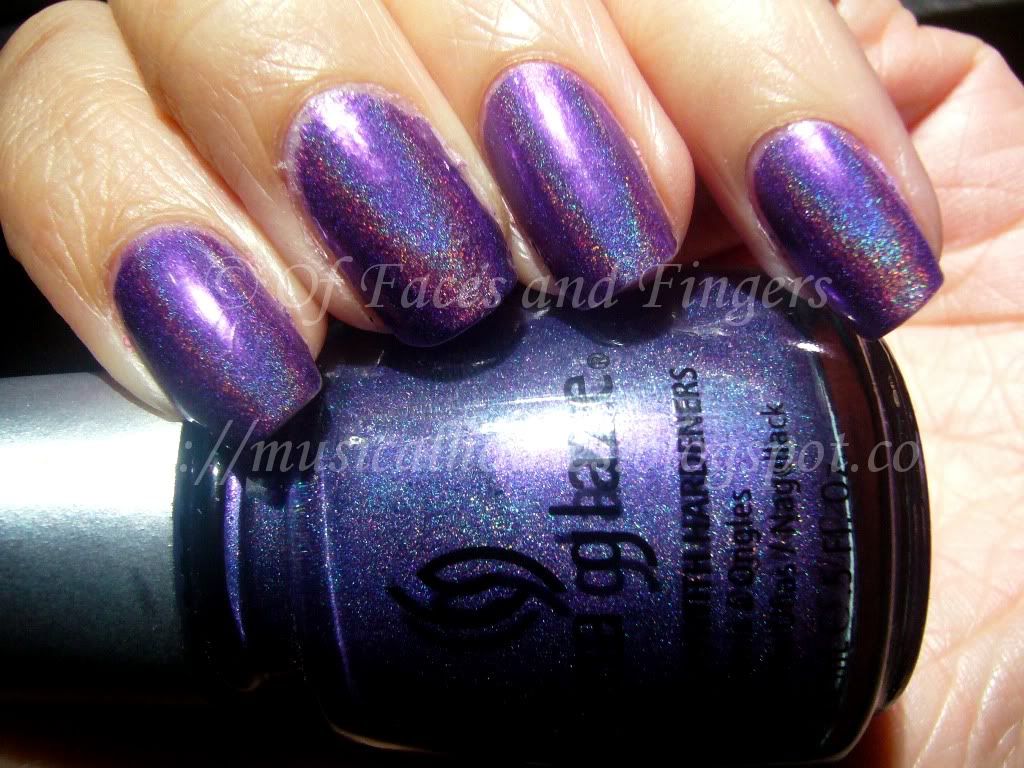
I love China Glaze LOL, it's an awesome royal purple holo. The only thing is that I feel sad about is that the holo effect was a little bumpy and rough on my broken nail, because the surface of the wrap isn't totally smooth, even after filing. And here's a slightly more flattering photo of my nails:
I guess this means I'm not going to be able to wear holos for the next couple of months until my tear grows out and I don't need the wrap :( And yes, this does mean that you'll see my nail wrap sticking out of all the next few NOTDs, unfortunately. They get less obvious as the wrap grows out, but I hope you guys can pretend it's not there! :X
Home »
China Glaze »
Holographic »
Nail Tips »
Nails »
NOTD »
Purple »
Tutorials »
How to Fix a Broken Nail With a DIY Tea Bag Wrap


